Hey! Do you want to Fix the Camera Error Can’t Connect to Camera on Android Phone (Xiaomi device, Samsung, Realme), then should full article.

Are you experiencing this problem? Well, you don’t have to deal alone with this matter. Many users face similar problems on mobile devices. You can shoot with an Android camera.
It appears that the camera does not have any connections to your smartphone. It was an extremely frustrating situation. What are the reasons why? It is accessible from almost every Android phone. So no matter what phone you have you can face a camera challenge.
Well, you have not only dealt with it. It is common to find people who face this error when using mobile apps. In this case, there is no way to capture photos using Android devices. It’s a black screen showing a problem message: Can’t connect to the camera.
This was an extremely difficult matter. I’m not sure what’s going on. This error message is accessible on all Android devices. No matter what Android device you use, you will have this problem with the camera too.
If you are getting an error Camera Error Can’t Connect to Camera while opening the camera or while trying to open the camera on particular apps, then it might be several causes of the error. Such as cache data, camera apps, and hardware problems.
How to Fix Camera Error Can’t Connect to Camera?
To fix Can’t Connect to Camera on android follow these easy steps-
Solution 1. Restart your Android device
If your mobile hangs or the last update is not done correctly, then it is possible that you may get the error Can’t Connect to Camera while turning on the camera. Once, you restart your phone and check.

If the issue persists, continue to the Next Step-
Solution 2. Force Stop Camera App
If you are turning on the camera and the error is coming, then once you force stops the camera apps and then check. To force stop camera apps, follow the process given below.
STEP#1. Tap on Settings and search Camera.
STEP#2. Tap on the Camera App.
STEP#3. Tap On Force Stop. Click on OK.

If the issue persists, continue to the Next Step-
Solution 3. Clear Camera Apps Cache and Data
This error can occur if you have not cleared the cache and data of the camera apps. To Clear Camera Apps Cache and Data follow these easy steps-
STEP#1. Tap on Mobile Settings.
STEP#2. Search Camera and tap on Camera Apps.
STEP#3. Tap on Storage.

STEP#4. Tap on Clear Data & Clear Data.

If the issue persists, continue to the Next Step-
Solution 4. Reset Camera Settings
If by mistake you have set some wrong settingsCamera, then this error” Can’t Connect to Camera” can come. Once you should reset Camera Settings. To reset Camera Settings Follow these easy steps-
STEP#1. Tap on Mobile Settings, Search Camera, and Tap on Camera from the list.
STEP#2. On the Top, Tap on Camera Settings.
STEP#3. Now, Tap on Reset Settings.

If the issue persists, continue to the Next Step-
Solution 5. Set Camera Apps as Allowed List
If Your Camera Apps Have Permission Denied Then You Can’t use the camera. To Set Camera Apps as Allowed list follow these easy steps-
STEP#1. Tap on Mobile Settings, Search Camera, and Tap on Camera from the list.
STEP#2. Click on Permissions Navigate to Camera and Tap on it.
STEP#3. Tap on “set allows only while using the App”.

If the issue persists, continue to the Next Step-
Solution 6. Use other Camera Apps
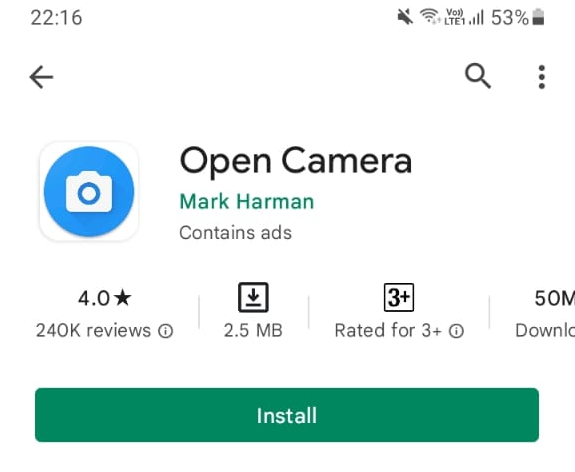
If the mobile camera is not working, then you can install third-party Android software through the play store. Open Camera, Photoshop Camera, ProCam X, SayCheese, Snap Camera HDR, Adobe Lightroom, Camera FV-5, Cymera, Filmic ProGoogle Camera, and GCam ports, HedgeCam 2, Manual Camera, VSCO, and Your stock camera app are some popular other camera apps.
To Install other Camera Apps follow these easy steps-
STEP#1. Navigate to Play Store and type any software name from the above list.
STEP#2. Tap On Install. After a few seconds, it will be installed.

STEP#3. After Install Camera Apps, Verify the issue.
If the issue persists, continue to the Next Step-
Solution 7. Factory Reset Your Phone
If you have followed all the above the steps such as -Restart your Android device, Force Stop Camera App, Clear Camera Apps Cache, and Data, Reset Camera Settings, Set Camera Apps as Allowed List, Use other Camera Apps and still have the same issue persists. Then once finally you need to reset your Phone as a Factory reset.
Note:- Before Resetting your Phone, You should take your phone backup because after factory resetting your device it will not be recovered.
To Reset Your Phone follow these easy steps-
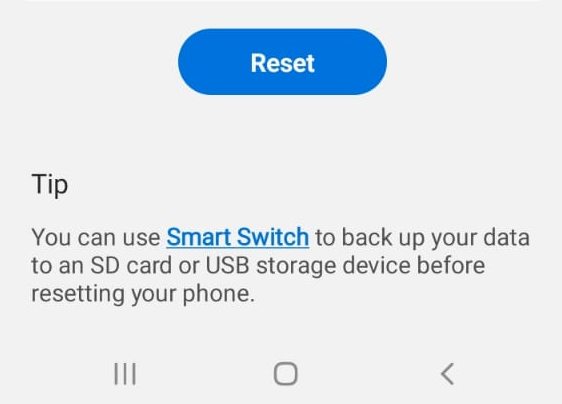
STEP#1. Tap on Settings, Search Factory Data Reset, and Tap on Factory Data Reset.
STEP#2. Click on Reset. Your Phone will be restarted during a factory reset. It will be taken approximately 5 min to complete this process.

Solution 8. Change your Hardware
If you have followed the above 7 solutions and still the problem is coming. There was an issue with my friend’s phone, so we talked to mobile technicians in India’s largest mobile repairing market Karol Bagh New Delhi, According to them the camera card or camera fault. Technicians changed his camera device and his mobile started working.
So, This is all about the “Camera Error Can’t Connect to Camera mi” on Android Phones.
We hope that you like this Article and helpful for fixing your issue. So We will request this article with the users having the same issue.
You can also Join Us on Social Media Pages Like Facebook and Twitter.
Can’t Connect to Camera Can’t Connect to Camera Can’t Connect to Camera Can’t Connect to Camera
Thanks For Reading, Have A Nice Day.
Related-
- 3 Ways to Fix “Please open my apps to establish a connection with the server” in Play Store
- 5 Ways to Fix “Failed to obtain IP Address” Wi-Fi error on Mobile or Laptop
- 5 ways to Fix “there was a problem while parsing the package” on Android
- 3 Easy Ways to Fix Android System WebView won’t update” issue
- 5 Way to Fix Google Play Services Keeps Stopping Error In Android Phone 2022
- 3 Ways to Fix “Please open my apps to establish a connection with the server” in Play Store