In this article, we will discuss how to Create a Custom paper size on Epson LX-310 when the required option is not in the paper size list.
Epson LX-310 is one of the most popular Dot matrix Printer. You can see Dot Matrix Printer where need to be required a large number of the invoice such as Railway Tickets Counters, Retail Store, Government Offices, Bank Etc.
Each and every organization designs his invoice on different size then it can be challenging to set the Size of Invoice. If you are using the Epson LX series printer and want to create a custom paper size when the required option is not in the paper size list
How to create a custom paper size for an Epson printer in windows?
if you want to create a custom paper size for an Epson printer in Windows 10, Windows 8, Windows 7 then you need to follow these easy steps-
- Navigate to Control Panel.
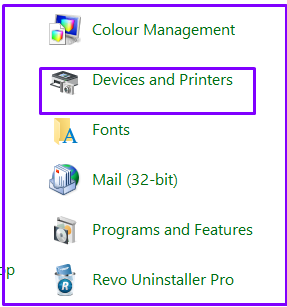
- Double Click on Devices and Printers.

3. Select EPSON Printer and Click on Print Server Properties.
4. Select Forms, check on “Create a New Form” and also Type Form Name.
In form Description (Measurements) select English.
Type and Width and Height According of Your Paper Size.
Click on Save Form and OK.
Note:- If you want to set this Customer Page Size for Permanently you need to follow these easy steps.
5. Right Click on Printer, and Select Printer Preferences.
6. Now select Custom Form Paper Size and Click on OK.
7. Right Click on Printer and select Printer Properties.
8. Click on Advanced.
9. Navigate to Device Settings.
Select Form to Tray Assignment and Click on Apply then OK.
Conclusion:
So, This is all about the “How to create a custom paper size on Epson LX-310”.
We hope that you like this Article and helpful for the “How to create a custom paper size on Epson LX-310“Issue. You can also Join Us from Social Media Pages Like Facebook and Twitter.
Thanks For Reading, Have A Nice Days.
Pingback: How to install HP 1020 plus printer in Windows, Ubuntu, and MAC - Concepts All